

If your kitchen is the size of a closet and you’ve started storing the cutting board on top of the fridge, you’re not alone. Search Reddit’s home and apartment forums for “small kitchen” and you’ll find thread after thread that opens with the same line: I cannot stand my kitchen anymore.
The 31 small kitchen storage ideas below pull from professional organizers, cabinet pros, and homeowners who actually solved the problem. Some cost five dollars. Some require a screwdriver. A few involve replacing a base cabinet, and one of those (drawer-base cabinets in the lowers) is the single biggest “I wish I had done this from the start” comment in every kitchen remodel thread on Reddit.
31 Small Kitchen Storage Ideas
($200, one weekend)
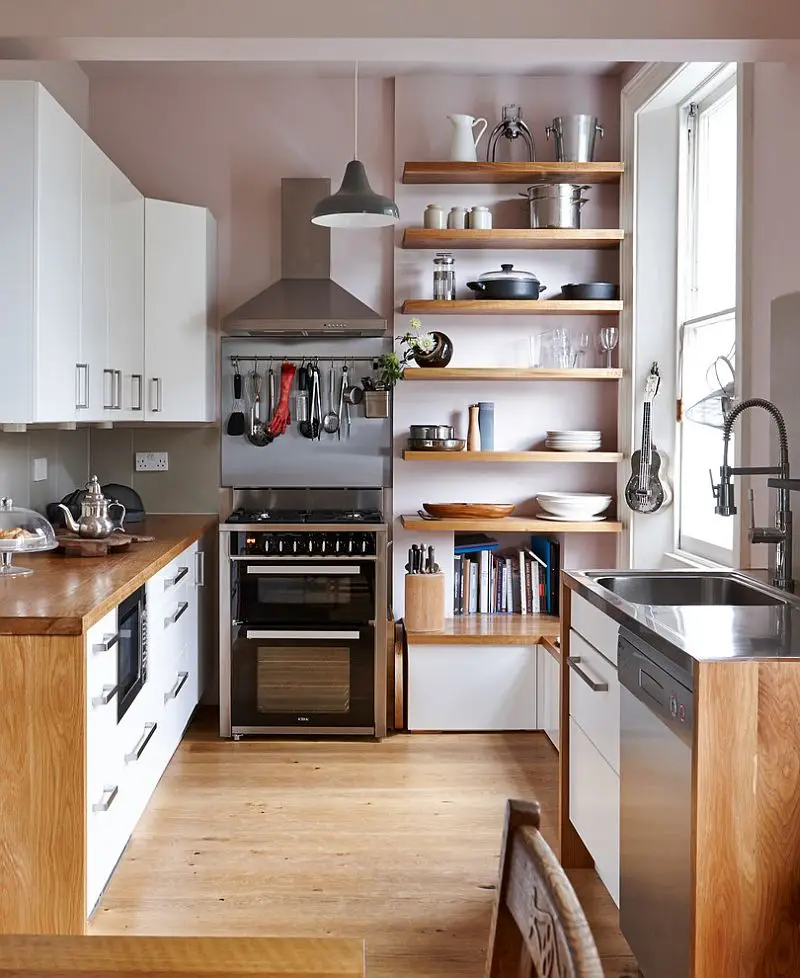
($400–$1,200 hardware)
+ filler pull-outs
How do you maximize storage in a small kitchen?
Inventory and purge before you buy anything. Then attack five zones in order: walls and vertical space, cabinet interiors, drawers, under-sink and corners, and the space beyond your cabinets (counters, walls, fridge tops, neighboring rooms). Most kitchens gain 30 to 50 percent more usable storage with a weekend of work and under $200 in organizers. Replacing door cabinets with drawer-base cabinets adds another 25 to 40 percent on top of that.
Here’s how to do it.
The 5 zones to attack
- Walls and vertical space: the cheapest and most overlooked storage real estate.
- Cabinet interiors: pull-outs, risers, and door-back racks turn a half-used cabinet into a full one.
- Drawers and counters: divide what you have, then clear what doesn’t earn its spot.
- Under-sink and corners: the two areas every kitchen wastes by default.
- Beyond the cabinet: fridge sides, dining rooms, fold-down surfaces, and the toe-kick zone you’ve never thought about.
Skip ahead to whichever zone is bothering you most, or work top to bottom. Most readers find at least eight or ten ideas they hadn’t tried.
Walls and Vertical Space
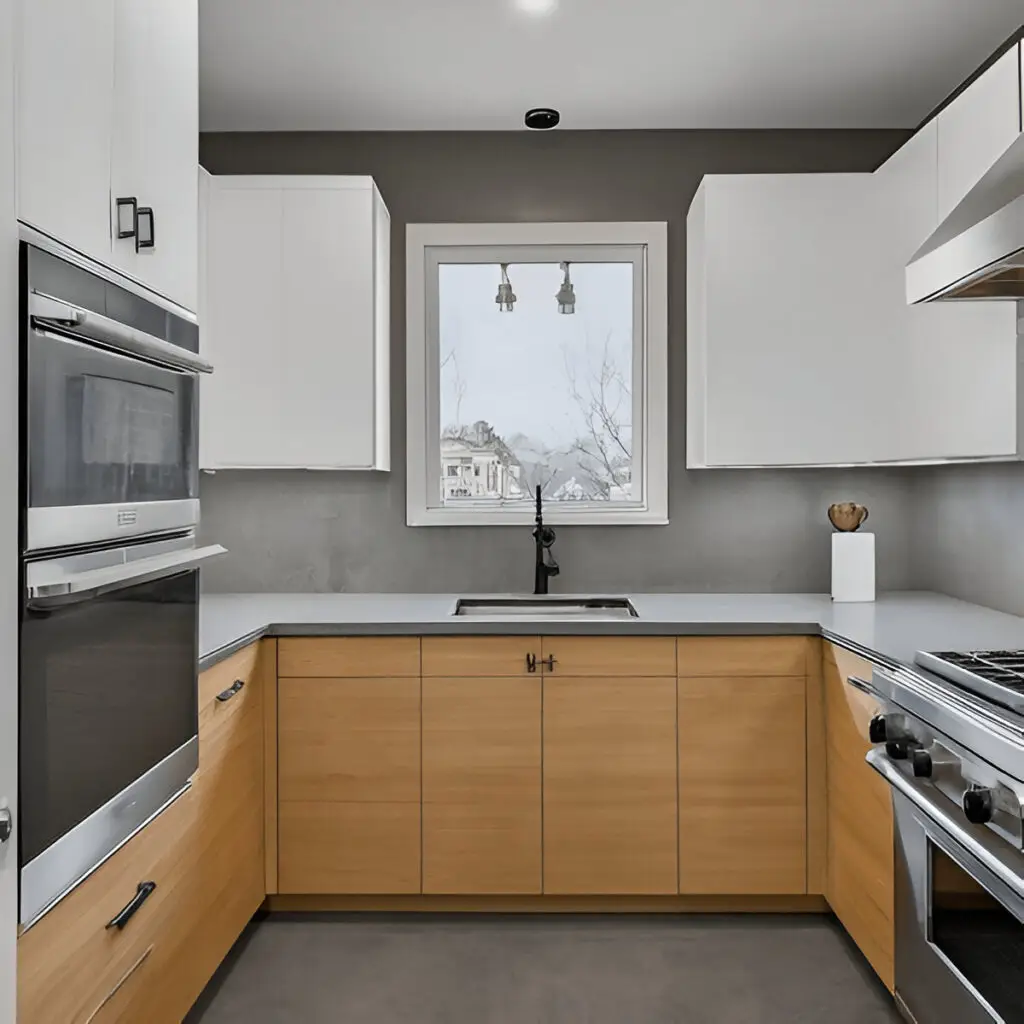
1. Hang a pegboard above your counter
A 24-by-48-inch pegboard holds the entire contents of one upper cabinet (pots, lids, measuring cups, mugs, hand towels, the lot). Drill four screws, paint it to match your cabinets, and rearrange the hooks any time your cooking habits change. This is the most-recommended fix in r/ApartmentHacks for a reason: it converts dead wall space into adjustable, visible storage that takes 30 minutes to install.
2. Mount a magnetic knife strip
A 16-inch stainless or walnut magnetic strip holds six to eight knives, frees up an entire drawer, and ends the daily wrist-twist of pulling knives from a butcher block. Mount it near your prep area at eye level. The strip also handles metal kitchen scissors, peelers, and microplane graters. Cost: $20 to $40. Time: 10 minutes.
3. Install a wall-mounted pot rail
S-hooks on a horizontal rail give every pot, pan, and skillet a permanent home, and free up the deepest, most-fought-over cabinet in the kitchen. IKEA’s Hultarp rail runs about $15 and supports a full set of cookware. Hang it on the wall behind the stove, on a side wall, or even on the inside face of an exposed cabinet. The aesthetic skews industrial, which suits modern Shaker kitchens well.
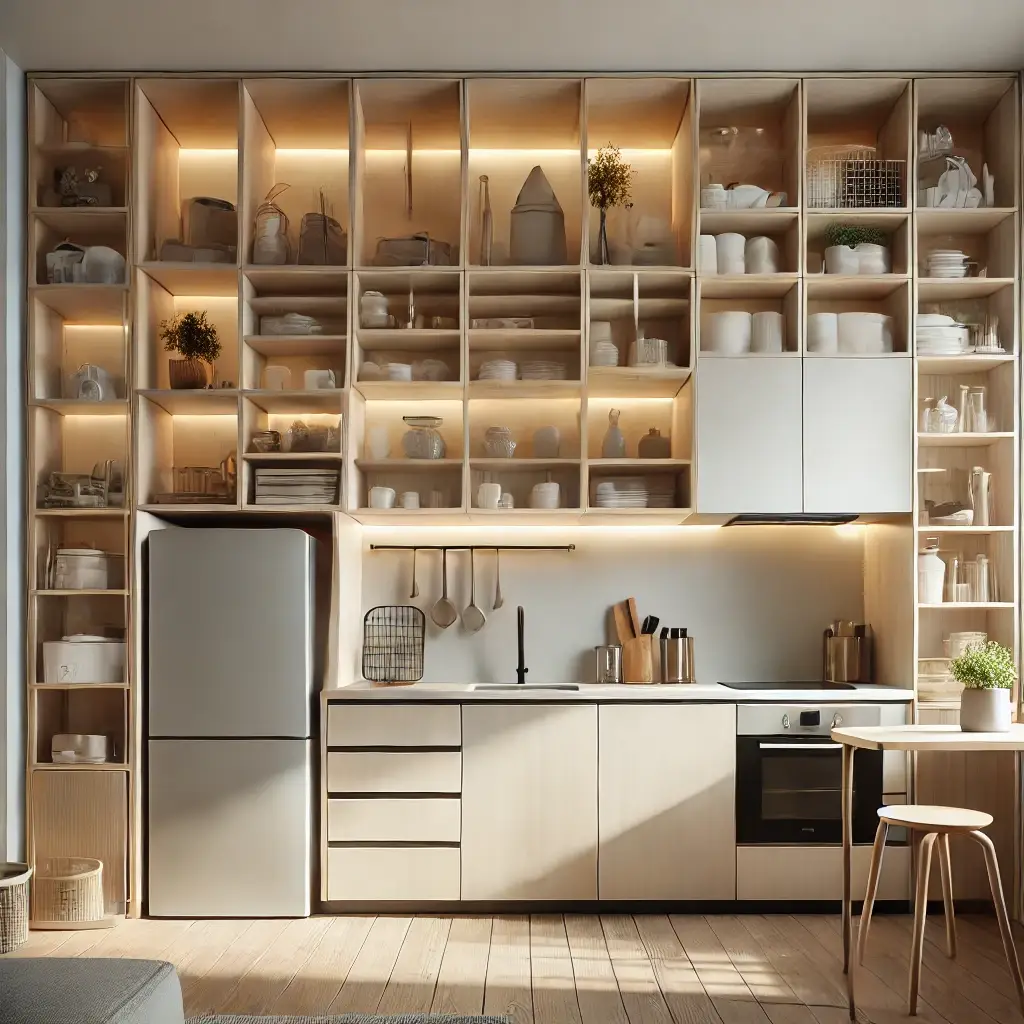
4. Add floating shelves above the counter
Two floating shelves in the gap between your upper cabinets and the counter add roughly the same storage as a 24-inch wall cabinet at a fraction of the cost. Use the lower shelf for everyday glasses and mugs, the upper for tall canisters and cookbooks. Pick brackets rated for the weight you plan to put up. Most failures happen because someone hung 30 pounds of dishes on a 10-pound shelf.

5. Use the sides of cabinets
Any cabinet that doesn’t butt up against a wall has 12 to 24 inches of usable vertical space on its exposed side. Mount a narrow bookshelf-style organizer to hold spices, oils, or cookbooks. Or install a hidden tablet/iPad mount so recipes don’t take up counter space. This is one of the highest-yield fixes for galley kitchens with an exposed cabinet end.
6. Put the backsplash to work
A pot rail mounted directly to the backsplash holds utensils, oven mitts, and small pots within arm’s reach of the stove. If you don’t want to drill into tile, a row of 3M Command hooks works for anything under three pounds. Tension rods between two cabinets create the same effect with zero hardware. Slide on S-hooks for utensils.
Cabinet interior upgrades
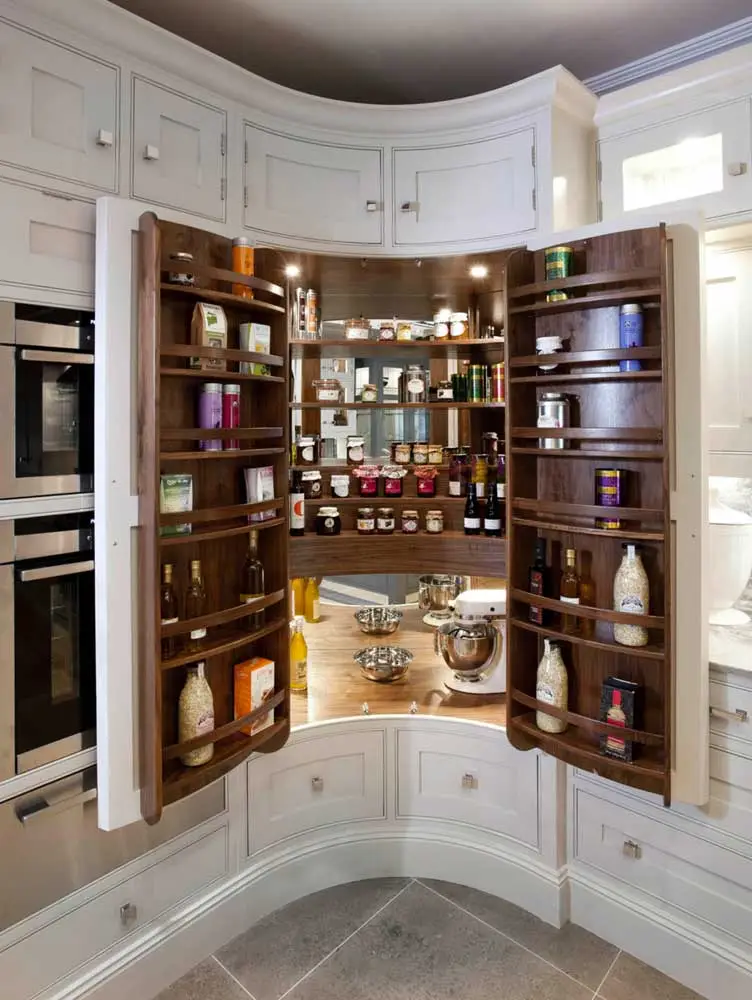
7. Switch your lower cabinets to drawer-base cabinets
This is the highest-impact upgrade in any small kitchen. Across every kitchen-remodel thread on Reddit, the same line shows up: every lower cabinet should be a drawer. The reason is simple physics. A 24-inch deep base cabinet with one shelf wastes 60 percent of its volume on dead air, because anything pushed past the front 8 inches becomes invisible. Three deep drawers in the same footprint give you 100 percent access to the contents.
If you’re remodeling, spec drawer-base cabinets for every lower except the sink cabinet. Look for boxes with full-extension Blum soft-close slides; they’re standard on our Fabuwood and Mantra lines and stay smooth for the life of the cabinet. If you’re working with what you have, the next idea is the closest fix.
8. Add pull-out trays inside existing cabinets
A pull-out wire or wood tray turns a fixed cabinet shelf into a quasi-drawer. Two trays in a 24-inch cabinet recover the back-half storage you currently can’t reach. Brackets screw into the cabinet base and back, and the install takes about an hour per tray. Rev-A-Shelf and Häfele both make retrofit kits in widths from 11 to 30 inches; budget $25 to $80 per tray. This is the fix most professional organizers recommend for renters and homeowners who can’t replace cabinets.
9. Install shelf risers
A simple cabinet riser doubles your shelf capacity by stacking dishes, mugs, or canned goods on two levels instead of one. Look for collapsible expandable risers that fit oddly-sized cabinets and pack flat when you’re done. Most homeowners can fit four risers in a kitchen and gain 20 to 30 percent more usable cabinet volume.
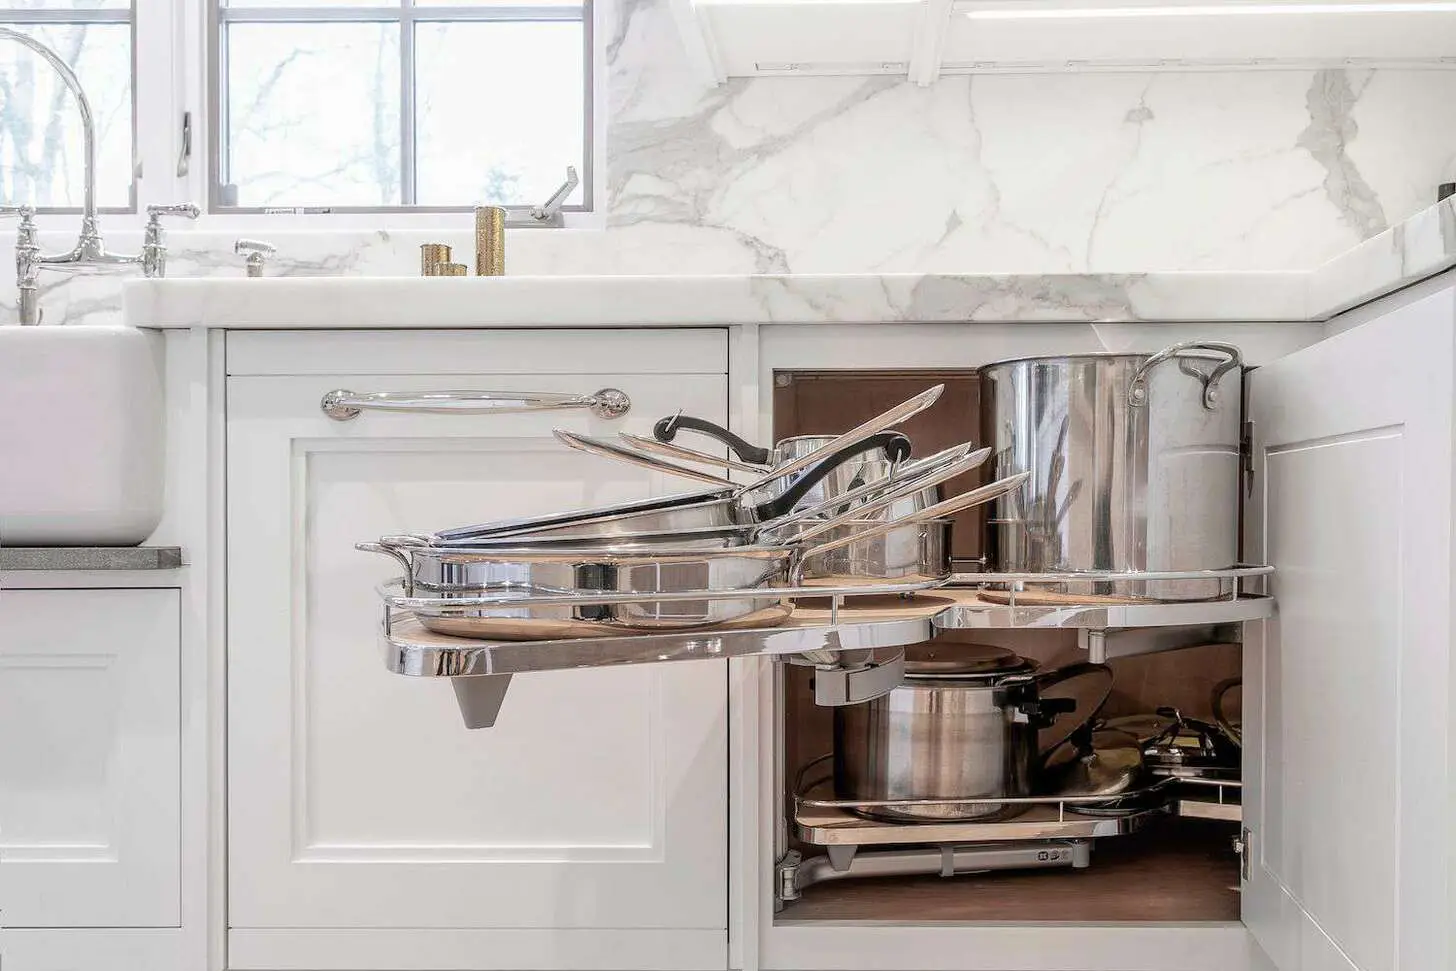
10. Use lazy Susans for corner cabinets and pantry shelves
A 12-inch or 14-inch lazy Susan turns a buried-in-the-back corner into a usable, accessible storage spot. The two-tier version doubles your capacity. Use them for spices, oils, vinegars, condiments, and snacks (anywhere small jars and bottles get lost behind each other). Cost: $15 to $30 each.
11. Add slim filler pull-outs to narrow gaps
The 3 to 6-inch gap beside your fridge, range, or end panel is the most-overlooked storage real estate in any kitchen. A slim filler pull-out turns it into a vertical column of spices, oils, baking sheets, or cutting boards. Rev-A-Shelf, Blum (SPACE TWIN), and Häfele all make versions in widths from 3 to 9 inches with depths matching standard 24-inch base cabinets. Cost: $80 to $250 retrofit, or speccable into a remodel. This is the one upgrade that meaningfully changes the storage math of a galley kitchen. Every inch of formerly dead space becomes accessible.
12. Hang storage on the inside of cabinet doors
A 6-inch deep over-the-cabinet-door rack adds four to six narrow shelves of storage on the inside of any cabinet door. Use it for spices, oils, baking supplies, dish towels, or measuring cups. The trick is checking your hinges first. Most modern soft-close hinges handle 5 to 8 pounds of door-mounted storage; older hinges may sag. If in doubt, magnetic spice tins on the inside of the door weigh almost nothing.
13. Add a knife rack inside a drawer
A drawer-mounted knife block lets you store 8 to 12 knives flat without taking counter space or wall space. Look for a slotted bamboo or beech insert that lays in the bottom of a 4 to 6-inch drawer. This solves a specific problem cleanly: knives in a butcher block dominate counter real estate in tiny kitchens.
14. Add tip-out trays at the sink front
The “false drawer” panel directly under your sink (the one that doesn’t open) can be converted into a tip-out tray that holds sponges, scrubbers, and dish brushes. The hardware kit costs about $15 and the install takes 20 minutes. You reclaim 12 to 18 inches of cabinet width that’s currently dead space.
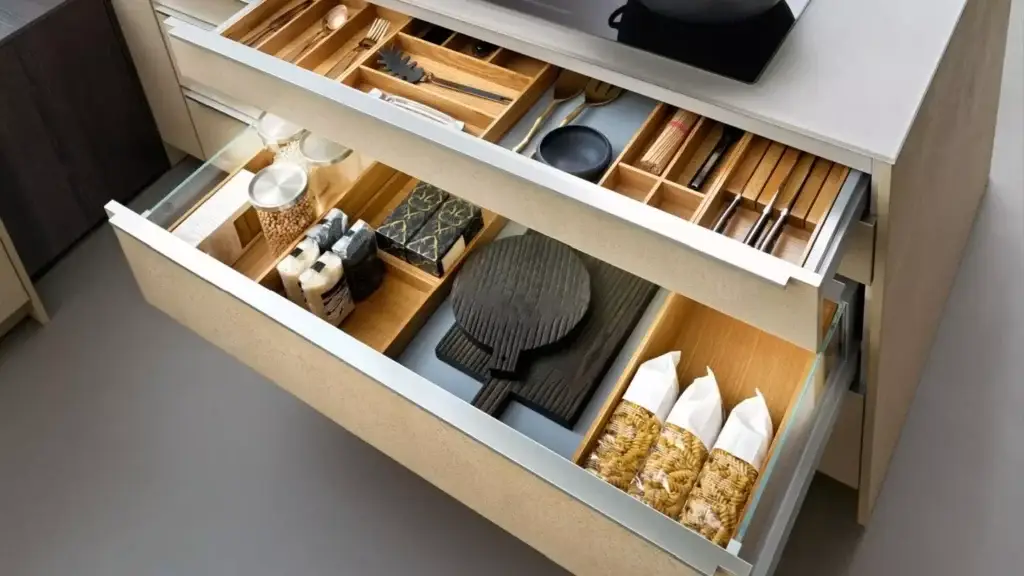
Drawer and Countertop Hacks
15. Use drawer dividers in every drawer
Most kitchen drawers operate at 40 to 60 percent efficiency because items live in jumbled piles. Adjustable bamboo or plastic dividers compartmentalize utensils, gadgets, and tools so each item has a permanent home. Spring-loaded dividers expand to fit any drawer width and don’t require tools. Plan on $30 to $60 to fully outfit a small kitchen. For a modern upgrade, in-drawer outlets like the Docking Drawer Blade Series put USB-C and AC power inside a designated drawer. Small appliances and chargers disappear off the counter completely.
16. Build a dedicated spice drawer
A flat tiered spice drawer insert holds 30 to 60 jars at a glance, alphabetized and label-up, versus the chaos of stacking spice tins in a cabinet. If your drawers are too shallow, a magnetic spice rack on the side of the fridge or inside a cabinet door does the same job. The point is seeing all your spices at once so you stop buying duplicates.
17. Stack lazy Susans in tall cabinets
Tall pantry-style cabinets often have one shelf and a lot of vertical waste. A two-tier lazy Susan stacked above a single-tier one gives you three rotating storage levels in the same footprint. This works especially well for canned goods, baking supplies, and anything else that comes in small uniform containers.
18. Use a tiered cutlery insert
A two-level cutlery tray (everyday silverware on top, special-occasion or rarely-used items on the slide-out bottom layer) gives you double the silverware storage in the same drawer. The top tray rolls back to reveal the lower compartment. Useful in kitchens with one designated silverware drawer and no room for a second.
19. Use a tension rod to divide narrow drawers
A spring-loaded tension rod laid horizontally inside a drawer turns it into two compartments. This is the cheapest drawer-divider hack ($3 at a dollar store) and works especially well for narrow drawers that hold knife sharpeners, measuring cups, or peelers.
20. Clear the counter with a wall-mounted utensil cup
A magnetic or screw-mounted utensil cup attached to the side of a cabinet or to the backsplash gets your spatulas, whisks, and wooden spoons off the counter. The visual impact of clearing one of those countertop crocks is bigger than you’d think. Most kitchens regain 25 to 35 percent of usable counter space.
Under-sink and Corner Solutions
21. Add stacking under-sink drawers
The under-sink cabinet is the single most-wasted space in most kitchens because of the plumbing. Stacking pull-out drawers ($30 to $80) work around the P-trap and give you two or three levels of accessible storage for cleaning supplies, sponges, dish soap, and trash bags. Look for U-shaped designs that contour around the pipes.
22. Install a pull-out trash and recycling cabinet
If you have a 15-inch base cabinet you can convert, a double pull-out trash kit ($60 to $120) gets the trash can off the floor and adds a recycling bin in the same footprint. Most kits also include space above for a paper towel roll. This is a top-three “wish I had this” for renovating homeowners on r/kitchenremodel.
23. Use corner drawers instead of a lazy Susan
If you’re remodeling and have a corner cabinet, corner drawers outperform lazy Susans by every measure: full access, no spilling, no awkward reaching. Rev-A-Shelf’s 4WCSD corner drawer system and the Kessebohmer LeMans corner pull-out are the two most-specced versions; both deliver about 35 to 50 percent more usable storage than a standard corner cabinet. Spec these into any small-kitchen remodel.
24. Add toe-kick drawers
The toe-kick (the recessed strip at the bottom of your base cabinets) is dead space in 99 percent of kitchens. A toe-kick drawer ($80 to $150 retrofit, or speccable on new cabinets) adds 4 to 5 inches of shallow storage. It’s perfect for cookie sheets, cooling racks, large platters, and other flat items that have no good home elsewhere.
25. Put motion-activated lights in dark cabinets
Battery-powered LED strips ($15 to $25) inside under-sink and pantry cabinets light up when you open the door. Sounds minor, but the difference between finding things and digging blindly is the difference between using your storage and avoiding it.
Beyond the Cabinet
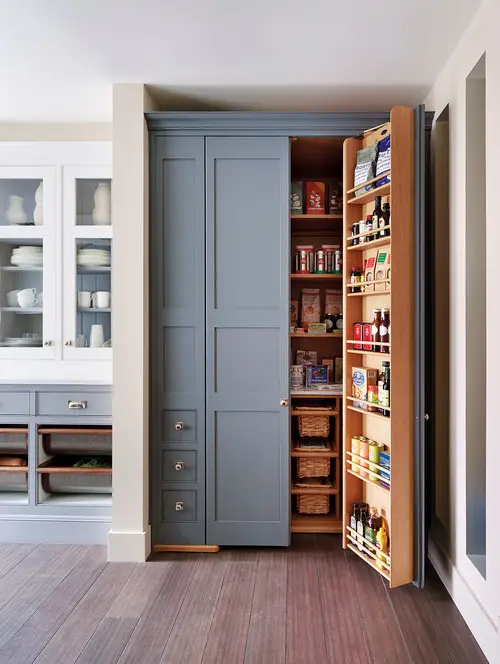
26. Use an over-the-door rack on your pantry or cabinet
A deep over-the-door organizer (\$20 to \$40) turns the back of a pantry door into four to eight narrow shelves of storage. Use it for canned goods, spices, cleaning supplies, or kid snacks. If you don’t have a pantry, the same rack mounts inside a tall cabinet door.
27. Buy a slim rolling cart
A 12-inch-wide rolling cart (the IKEA Råskog runs $40) slides into the gap between your fridge and a wall, between the oven and a counter, or anywhere there’s a 13 to 16-inch sliver of floor space. Pull it out to use as extra prep counter, push it back to disappear. Three or four shelves of storage in a footprint smaller than a chair.
28. Install a fold-down table
A wall-mounted fold-down table gives you a dining surface or extra counter that disappears when you’re not using it. Mount it under a window or against a blank wall. Hardware kits range $30 to $80 and most homeowners install one in 90 minutes. This adds usable square footage that the kitchen footprint doesn’t technically have.
29. Steal space from the next room
If your kitchen butts up against a dining room, hallway, or living area, a freestanding hutch, sideboard, or buffet absorbs the overflow. Special-occasion serving ware, seasonal dishes, and small appliances live there. Your daily-use kitchen tightens up; the overflow has a real home. This is the fix for galley kitchens that cannot grow.
30. Use the top of your cabinets
The 12 to 18-inch gap between the tops of upper cabinets and the ceiling is prime storage for anything you use less than once a month: large platters, holiday serving pieces, the second blender. Hide it in matching baskets and the kitchen looks intentional rather than cluttered. Crash course: take a photo straight on, count what’s currently visible from a standing position. Anything that isn’t visible can go up there.
31. Hide bulky cookware inside the oven
The pro chef’s secret: cast-iron pans, Dutch ovens, and seldom-used skillets live inside the oven when not in use. Pull them out before preheating. The oven holds 15 to 25 pounds of cookware that no longer takes up cabinet space. The bottom drawer below the oven (the broiler drawer) handles a similar load if you don’t broil often.
What to do First
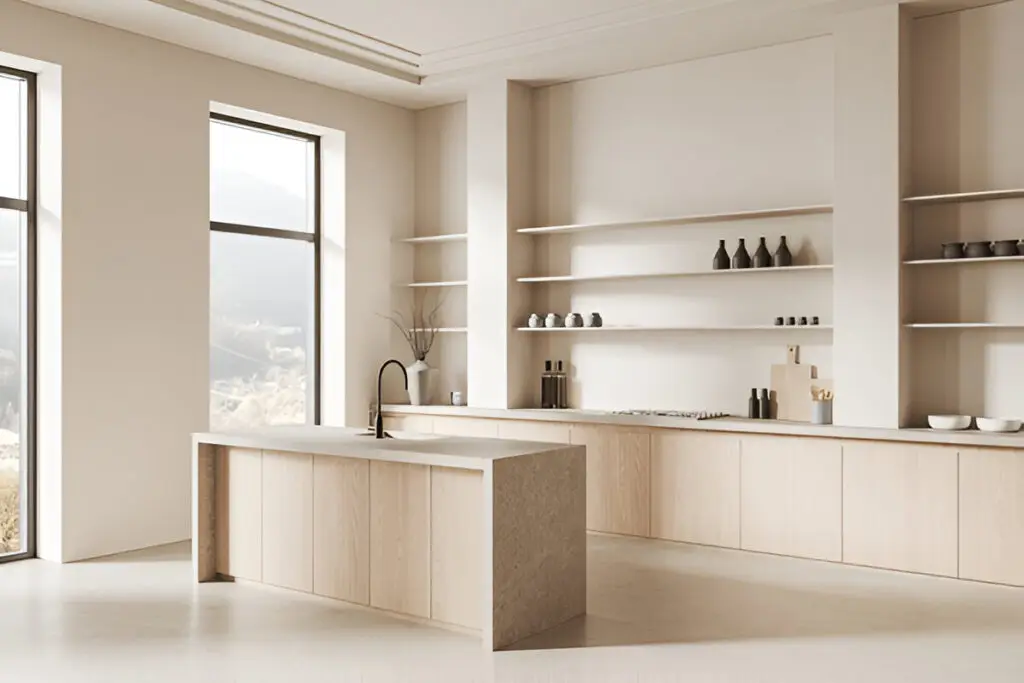
Before you buy a single organizer, do this: pull everything out of one cabinet or drawer, sort what’s there, and throw out or donate anything you haven’t used in 12 months. Most kitchens shed 20 to 30 percent of their contents on the first pass. Now you know what you’re storing, and you’ll buy the right small kitchen storage ideas instead of guessing.
Three things to look for during the purge:
- Duplicates (three measuring cup sets, four can openers, five wooden spoons)
- Broken or chipped items still being kept “just in case”
- Single-use gadgets that haven’t earned their footprint
Then walk around the kitchen and write down where you reach for things. The items you grab daily belong in the most accessible spots. Once-a-week items can live one shelf up. Once-a-month items go on the top of cabinets, in the dining room, or in the basement.
When to upgrade your cabinets?
If you’ve maxed out organizers and the kitchen still feels cramped, the bottleneck is the cabinet boxes themselves. Three upgrades are worth the cost:
Drawer-base cabinets in the lowers. Three drawers in a 24-inch base cabinet hold roughly 40 percent more usable contents than a door cabinet with one shelf, because nothing gets buried in the back. This is the single most consistent renovation regret on Reddit: I should have done all drawers. If you’re considering a remodel or even just swapping a cabinet or two, drawer-base goes first.
Cabinets that run to the ceiling. Standard upper cabinets stop 12 to 18 inches short of the ceiling. Stacked or extended-height uppers reclaim that space and add a full shelf of storage per cabinet. Most RTA cabinet lines, including the Fabuwood and Mantra lines we stock, offer 42-inch tall uppers as a stock option.
Pull-down wall-cabinet shelves. If your uppers already reach the ceiling, a pull-down system like the Kessebohmer iMove brings the shelf contents down and forward in one motion. It’s the only good answer for short users or anyone reaching items above shoulder height multiple times a day. It’s a premium upgrade (figure $300 to $500 per cabinet installed), but for the right kitchen, it’s the difference between using the upper cabinets and ignoring them.
USA Cabinet Express stocks Shaker White, Blue, and Gray RTA cabinets, including drawer-base and 42-inch upper SKUs, across our seven showrooms in Texas, Virginia, and Missouri. If a drawer-base swap or filler pull-out makes sense for your kitchen, request a free quote or visit your nearest showroom to see the cabinets in person.
Frequently Asked Questions
How do I maximize storage in a small kitchen?
Start by purging anything you don’t use. Then work top to bottom: hang what you can on walls (pegboards, magnetic strips, pot rails), upgrade cabinet interiors with pull-outs and risers, divide drawers, attack the under-sink and corners, and use the space beyond the cabinet boxes (top of cabinets, neighboring rooms, fridge sides). Most kitchens gain 30 to 50 percent more usable storage with a weekend of work and under $200 in organizers.
How do I organize a small kitchen with no pantry?
Treat one upper cabinet as your pantry. Clear it of dishware and stack it with stackable bins, lazy Susans, and clear containers labeled by category. Add over-the-door racks on the inside for canned goods. If you have any wall space, freestanding open shelves give you a visible pantry without taking floor space. A baker’s rack or sideboard in the dining area absorbs anything that doesn’t fit.
Where should I store pots and pans in a small kitchen?
Three good options: a wall-mounted pot rail above the stove (highest visibility, fastest grab), a deep drawer in a drawer-base lower cabinet (best for stacking and protecting non-stick), or inside the oven (for cast iron and Dutch ovens you use less than weekly). The oven trick works because you preheat for most cooking anyway. Just remove the pans first.
What’s the best cabinet style for a small kitchen?
Shaker-style cabinets in white, gray, or light blue. The flat panel and clean lines visually disappear, making the kitchen feel larger than it is. For storage efficiency, prioritize drawer-base cabinets in the lowers and 42-inch tall uppers that reach the ceiling. Glass-front upper doors on one or two cabinets break up solid color and add display storage.
How do I keep counters clear in a small kitchen?
Move every appliance you use less than daily into a cabinet or onto a rolling cart. Wall-mount the utensil cup, the paper towel holder, and the knife storage. Use a fold-down extension or a cutting board over the sink for extra prep space. The rule of thumb: if you haven’t touched an appliance in seven days, it doesn’t deserve counter space.
How can renters add storage without damaging cabinets?
Stick to tools that don’t require permanent hardware: tension rods inside cabinets, Command hooks on cabinet sides and inside doors, magnetic strips on the fridge and metal cabinet faces, freestanding rolling carts, and over-the-door organizers. Pegboards can be mounted on French cleats that lift off when you move. Most landlords also allow small wall anchors if you patch and paint at move-out.
Are drawers better than cabinets in a small kitchen?
Yes, in almost every case. A standard 24-inch base cabinet with one shelf wastes about 60 percent of its volume because anything pushed past the front 8 inches becomes invisible. Three deep drawers in the same footprint give you 100 percent access to the contents. The trade-off is cost — drawer-base cabinets typically run 15 to 30 percent more than door cabinets — but on Reddit’s kitchen-remodel threads, the most consistent renovation regret is “I wish I had done all drawers.”
What can I put in a narrow 3-to-6-inch kitchen cabinet space?
A slim filler pull-out is the highest-yield use. Narrow gaps beside the fridge, range, or end panel become vertical storage columns for spices, oils, baking sheets, or cutting boards. Rev-A-Shelf, Blum (SPACE TWIN), and Häfele all make filler pull-outs in widths from 3 to 9 inches. Cost runs $80 to $250 retrofit. If you can’t install hardware, a slim freestanding tower or an over-counter spice rack works in the same footprint.
How much does it cost to maximize storage in a small kitchen?
Three tiers, depending on how far you go. A weekend of $5–$200 organizers (drawer dividers, shelf risers, lazy Susans, over-the-door racks) gets most kitchens 30–50 percent more usable storage. A mid-tier upgrade with retrofit pull-outs, slim filler cabinets, and a pull-out trash kit runs $400–$1,200 in hardware. A full small-kitchen cabinet upgrade with drawer-base lowers, 42-inch uppers, and corner pull-outs ranges $4,000–$12,000 depending on cabinet line and kitchen size. The first two tiers pay for themselves in usability immediately; the third tier adds resale value.
The bottom line
A small kitchen is a constraint, not a sentence. The 31 small kitchen storage ideas above start at five dollars and end at a partial cabinet swap. Start with a purge, work the five zones in order, and prioritize the upgrades that pay back daily: drawer-base cabinets, slim filler pull-outs, lazy Susans, and a wall-mounted pot rail. Most homeowners see a noticeable difference after one weekend of work. If the kitchen still feels cramped after that, the cabinets themselves are the limit, and a partial cabinet upgrade is usually cheaper and faster than people expect.
If you want to talk through a small-kitchen layout or see drawer-base RTA cabinets in person, find your nearest USA Cabinet Express showroom in Austin, Houston, Saint Louis, Chesapeake, Fairfax, or Fredericksburg, or request a free design consultation online.