
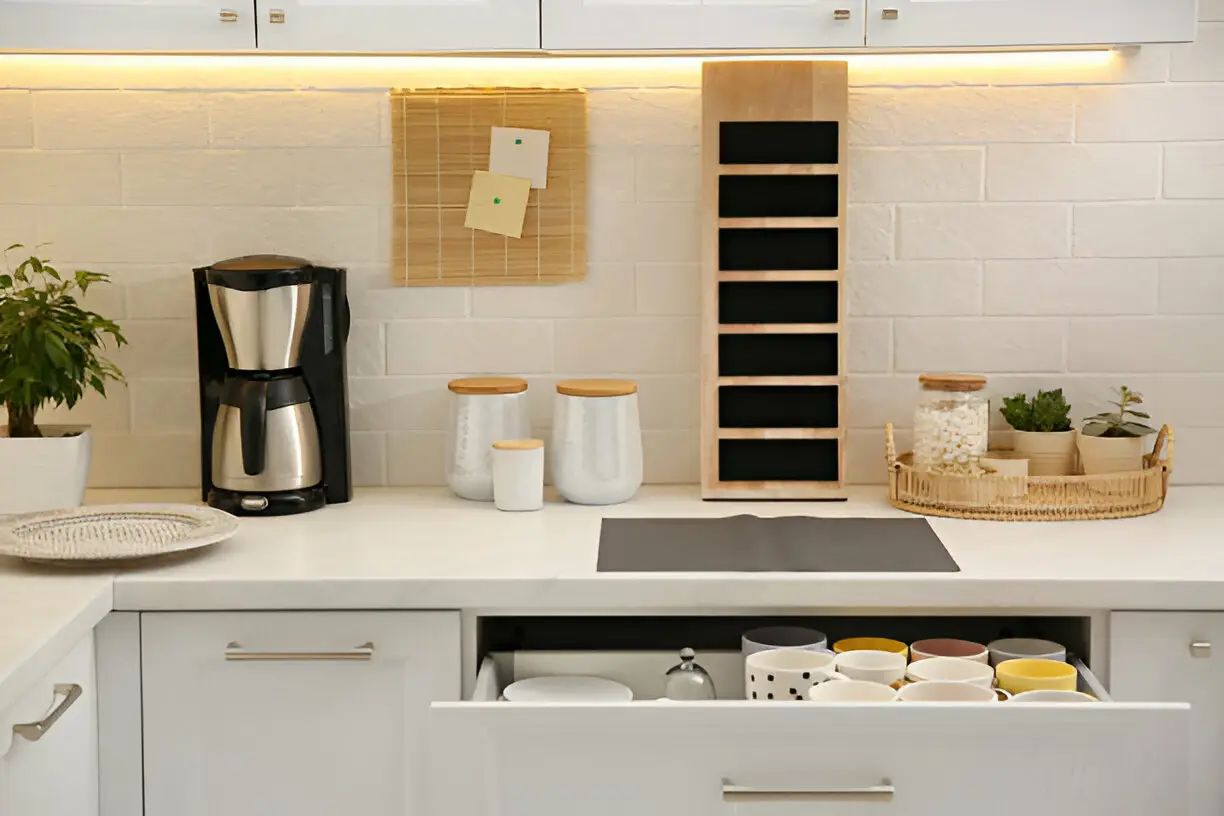

A messy cabinet is rarely a storage problem. It is almost always an organization problem. When you can open a door and put your hand on the right pan without moving three others first, the kitchen starts to feel bigger, even if you never added an inch of cabinetry.
You are not alone in caring about this. In recent renovation surveys, more than 66% of homeowners named cabinet and drawer organization a top priority, and about 82% said custom storage inserts improved their day-to-day quality of life. This guide walks through how to organize kitchen cabinets the way our designers set them up: declutter first, sort by how you actually cook, then add the hardware that holds the system together. Some of these 18 ideas take ten minutes. A few are worth building into your next remodel. Start anywhere, but the first three matter most, so read those before you buy a single bin.
1. Empty everything and declutter before you organize
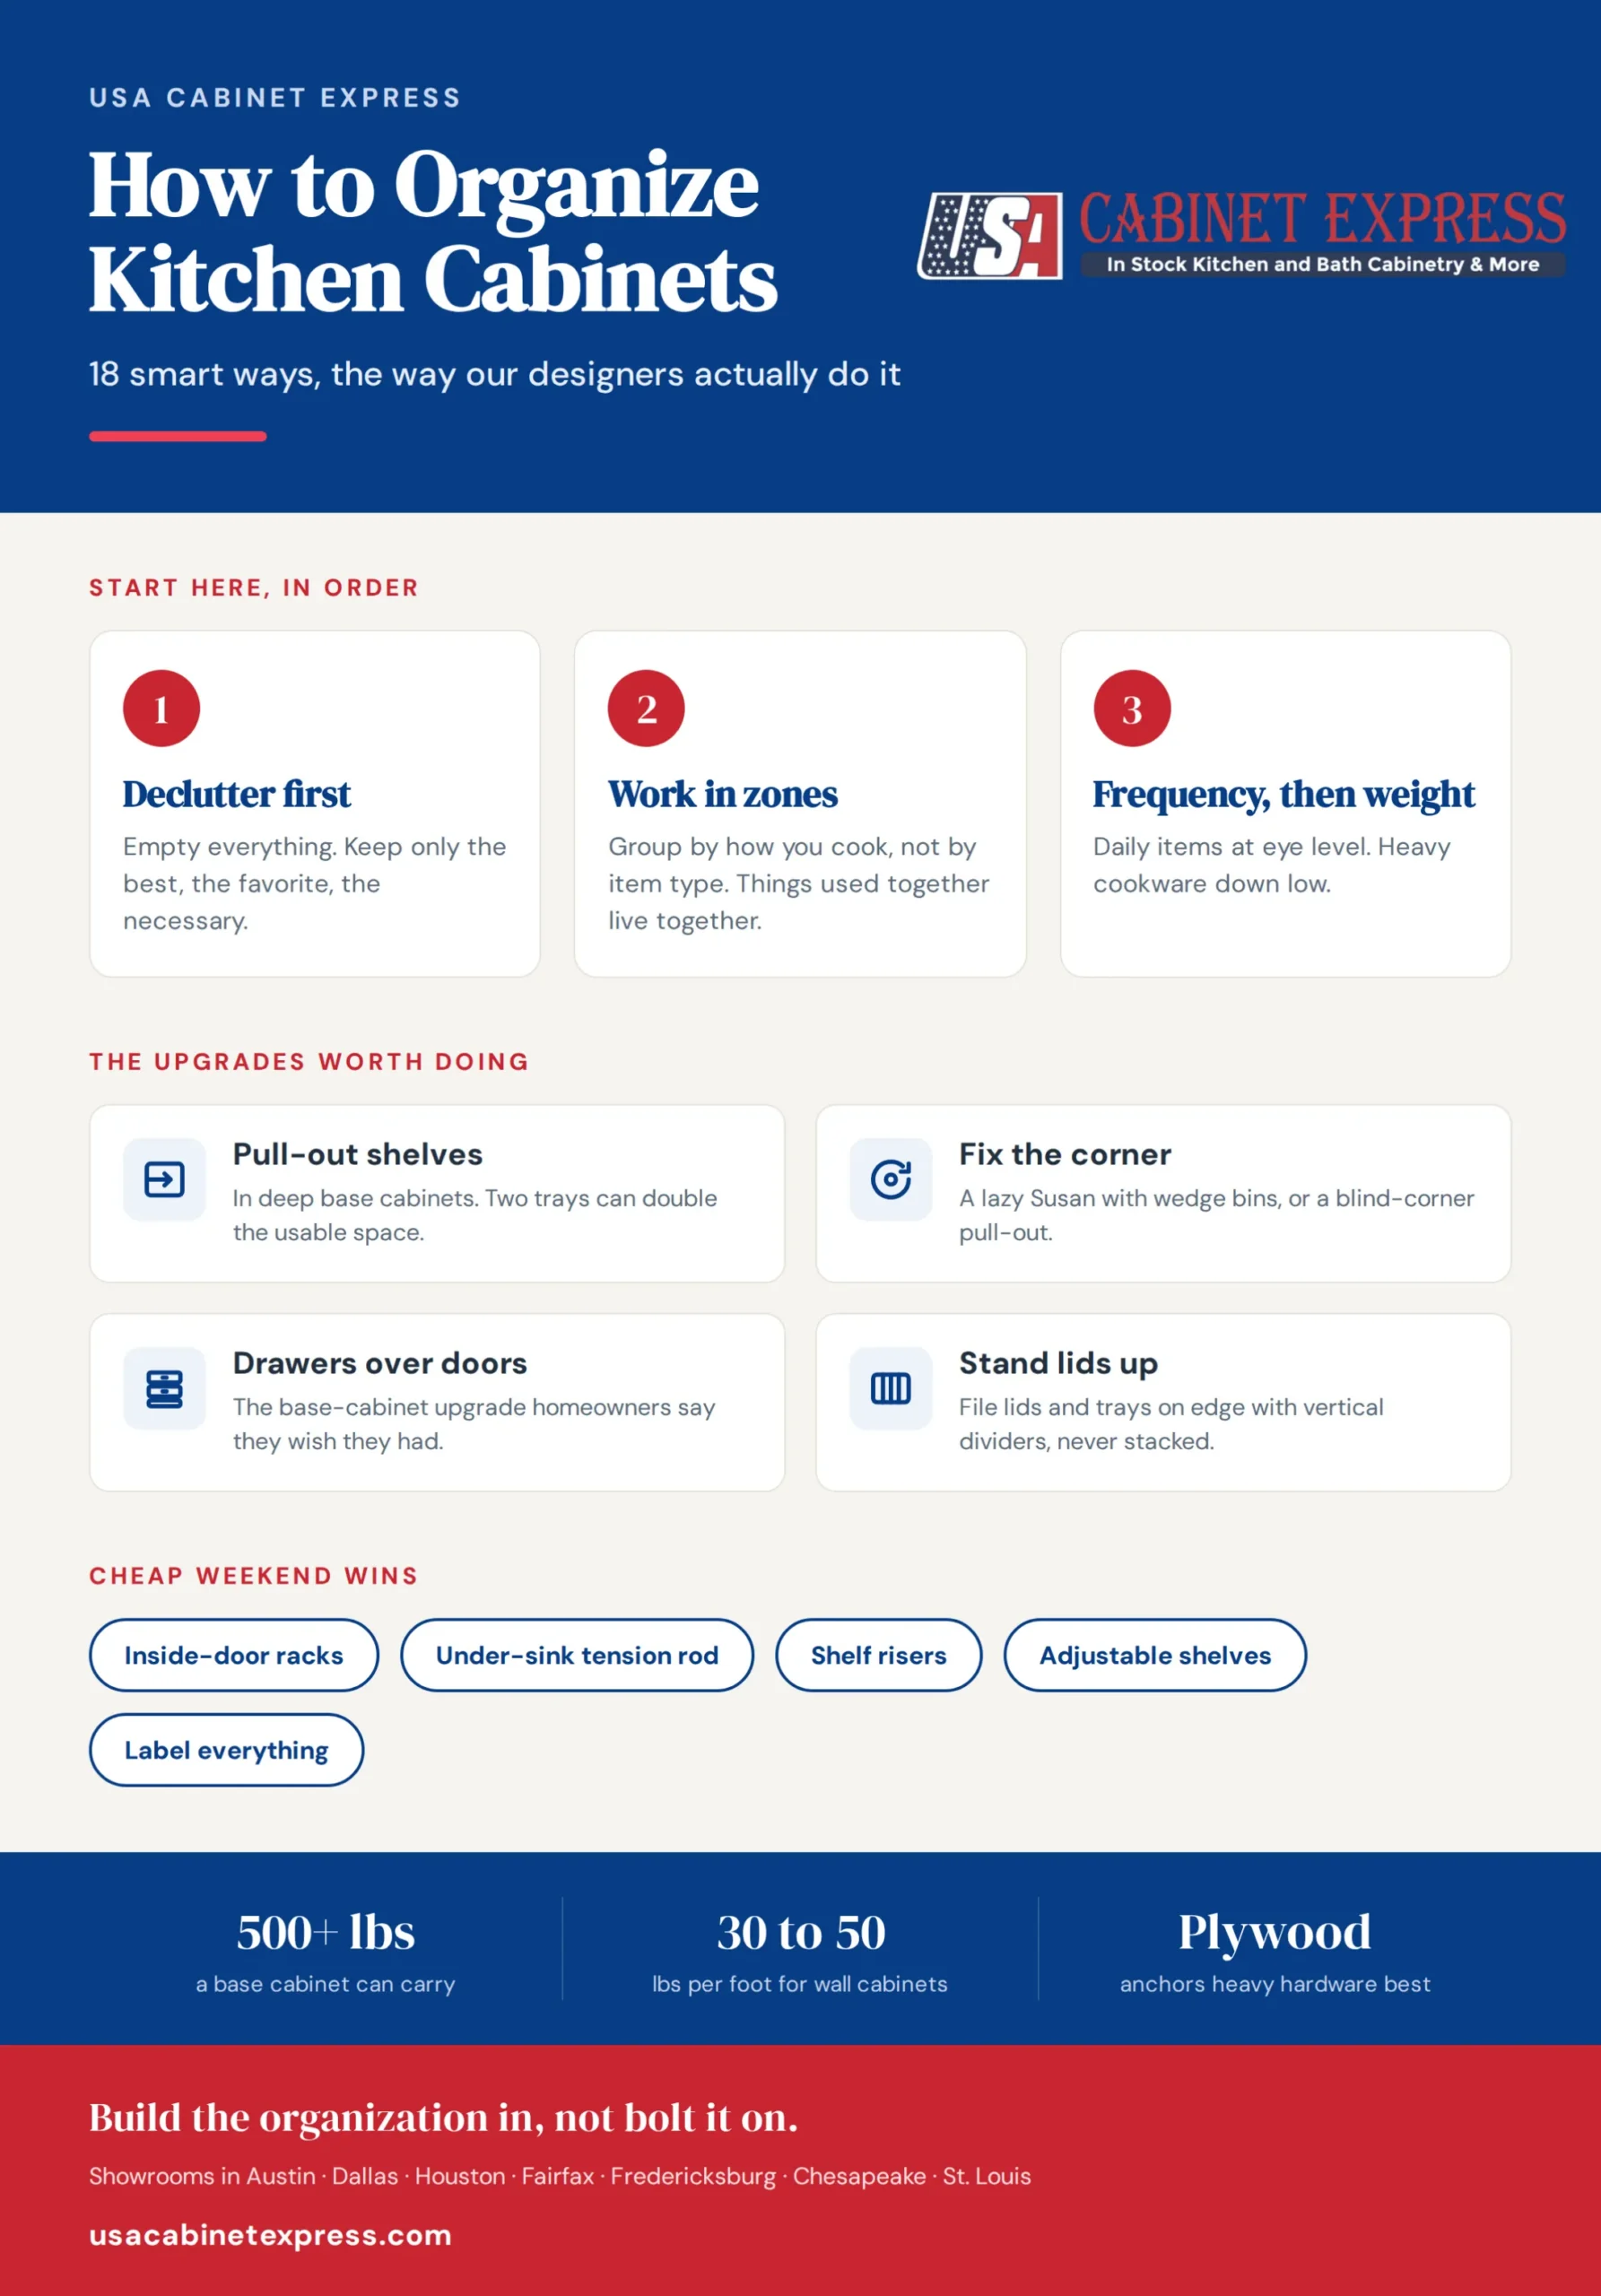
Pull every item out of one cabinet and set it on the counter. You will be surprised how much you are storing that you never touch: the second colander, the wedding-gift gadget, the lids with no container. Professional organizers use a simple filter, sometimes called the “best, favorite, necessary” rule. If a tool is not the best version you own, a favorite, or genuinely necessary, it goes.
Here is a test that proves the point. Pack away half your plates, bowls, and mugs, then cook normally for two weeks. Most households barely notice. And decluttering by itself is not the finish line. Even a perfectly lined-up shelf of 40 spices can still feel like chaos if half of them are duplicates you never reach for. Clear out first, then organize what is left.
2. Organize by zones, not by item type
This is the single change that fixes most kitchens. Instead of “all the cans here, all the dishes there,” group things by the job you are doing. Designers usually map five zones: cooking (pots, pans, oils, and spices by the range), prep (boards, bowls, knives by your main counter), cleanup (dish soap, sponges, trash under the sink), food storage (pantry items and containers in one tall cabinet), and serving (plates, glasses, mugs near the table or dishwasher).
Push it one step further and group by how you cook, not just by category. Keeping your Mediterranean oils, vinegars, and spices in one spot and your Asian ingredients in another beats lining up every oil together, because you grab a whole cuisine at once. The team at Neat Method calls your most reachable cabinets, the ones nearest the range, fridge, and dishwasher, your “prime real estate,” and those should hold daily essentials and nothing else. Add the zones that match your routine, too. HGTV professional organizer Brittani Allen carves out a coffee station and a kids’ lunchbox cabinet, because a zone built around a real habit is the one that stays organized.
3. Store by frequency first, then by weight
Inside each zone, place daily items at eye and waist level, where you reach without thinking. Heavy cookware and small appliances belong in lower cabinets, and there is a structural reason beyond convenience. A base cabinet sits on the floor and can carry 500 pounds or more, while a wall cabinet typically holds only about 30 to 50 pounds per linear foot. Load a stand mixer or a stack of cast iron up high and you are not just risking a strain, you are risking sagging shelves and doors that stop closing square.
One more thing if you plan to add heavy pull-outs or lifts: the cabinet box matters. Plywood boxes anchor heavy hardware far better than particleboard or MDF, which can tear out at the screws under repeated load. It is one reason we steer remodel clients toward plywood construction when storage is the goal.
4. Add pull-out shelves and roll-out trays to deep cabinets
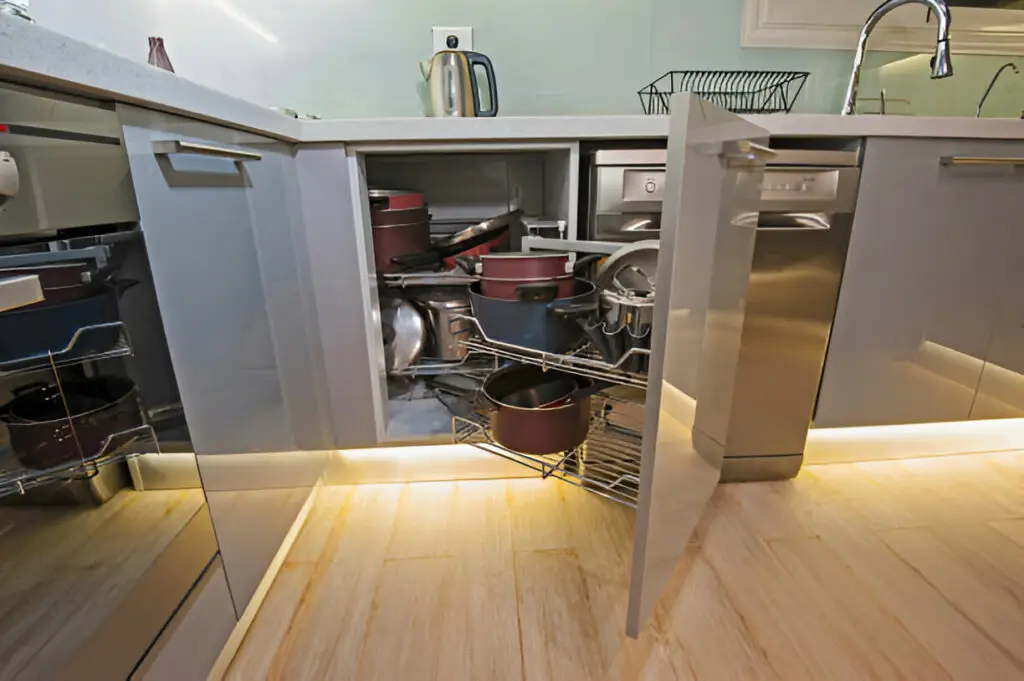
A deep base cabinet is where pans go to disappear. A pull-out shelf brings the whole shelf to you, so the lid you buried six months ago is suddenly in your hand. This is the upgrade real homeowners recommend most often, and one of the cheapest ways to make an older kitchen feel custom. Two roll-out trays in a single 24-inch cabinet can roughly double its usable storage.
Measure before you buy anything: interior width, depth, and height, plus hinge clearance and any obstructions. Fit is what makes or breaks a fitted organizer. Retrofit pull-out shelves run roughly $47 to $360 depending on size and build, so it pays to match the part to the opening the first time. For the heaviest items, a spring-assisted mixer lift swings a stand mixer up to counter height, and a pull-down shelf brings the contents of a high wall cabinet down to eye level. For more retrofit ideas, see our roundup of hidden cabinet storage ideas worth trying.
5. Rescue the corner cabinet with the right turning hardware
Corner cabinets hold huge volume behind a narrow opening, which is why items vanish into the back and never come out. Start cheap: a lazy Susan spins oils, sauces, and cans into reach. Its one flaw is that loose jars topple off the spinning edge and jam the works, so add wedge-shaped bins that wall in each section and lift out as a group (one bin just for storage lids works wonders).
For a blind corner, two systems beat a turntable. A Magic Corner pulls the front baskets out and drags the rear baskets forward with them, and it retrofits well for dry goods and lighter daily items. A LeMans uses peanut-shaped shelves that swing the back of the cabinet out along a curved path, which handles heavy cookware and stand mixers better but needs precise measuring and usually professional installation. If you would rather spend nothing, split the corner into zones: daily up front, weekly bins in the middle, holiday gear in the back, plus a stick-on light so you can see it.
6. Swap lower doors for drawers, then divide them
Ask anyone who has remodeled what they would do differently, and “drawers instead of doors on the base cabinets” comes up again and again. Bending and blind-reaching into the back of a low cabinet is the daily annoyance nobody mentions until it is gone. Deep drawers bring pots, lids, and even dishes up and out where you can see them.
The trick to keeping a deep drawer from becoming a jumble is a peg system. Designer Sarah Robertson of Studio Dearborn uses pegged drawer inserts so plates and pans cannot slide around when the drawer opens and closes, and the pegs reconfigure as your collection changes. Slanted inserts do the same for pans and their lids. You can buy polished versions or build one for under $10 with a pegboard and dowels. If a full door-to-drawer swap is not in the budget yet, retrofit pull-out trays behind the existing doors as a stand-in.
7. Hide trash and recycling in a pull-out cabinet
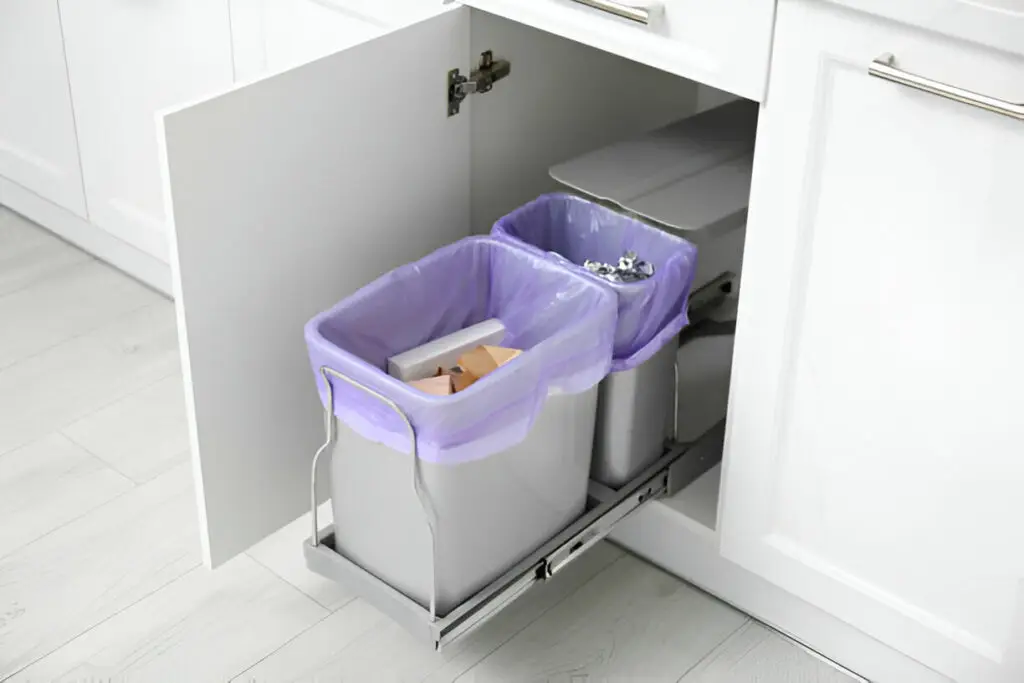
A pull-out bin cabinet gets the trash off the floor and behind a door, which keeps counters clear and cuts down on odors and pests. Most kits include separate compartments so trash and recyclables stay sorted, and they install into a standard base cabinet with basic tools. Put it next to the sink, inside your cleanup zone, so scraps go straight from cutting board to bin.
8. Build a pull-out pantry with clear, labeled containers
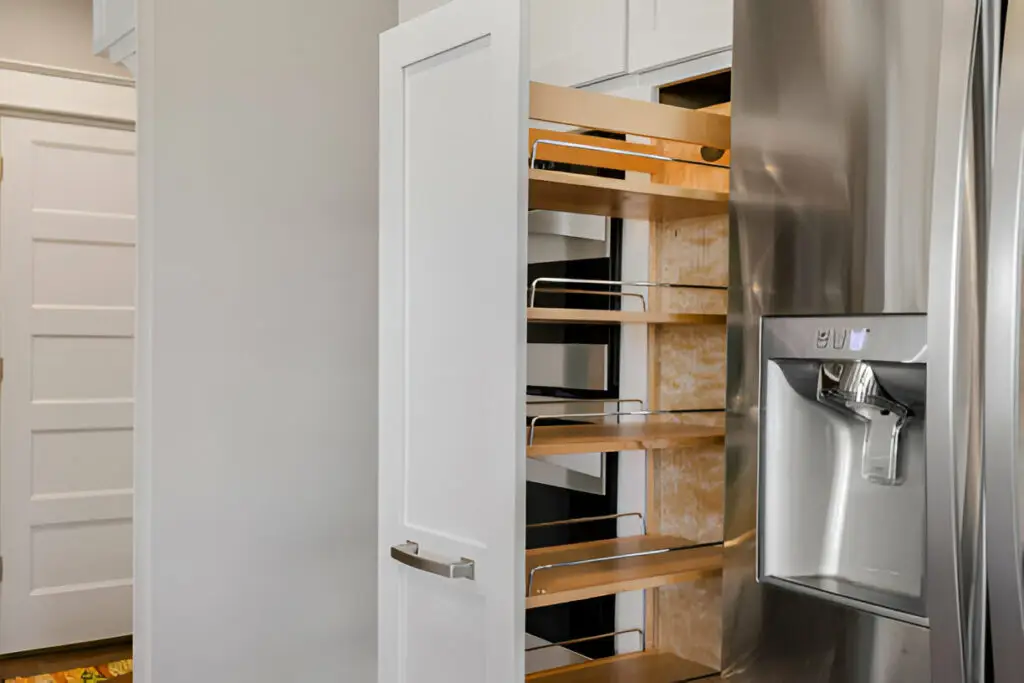
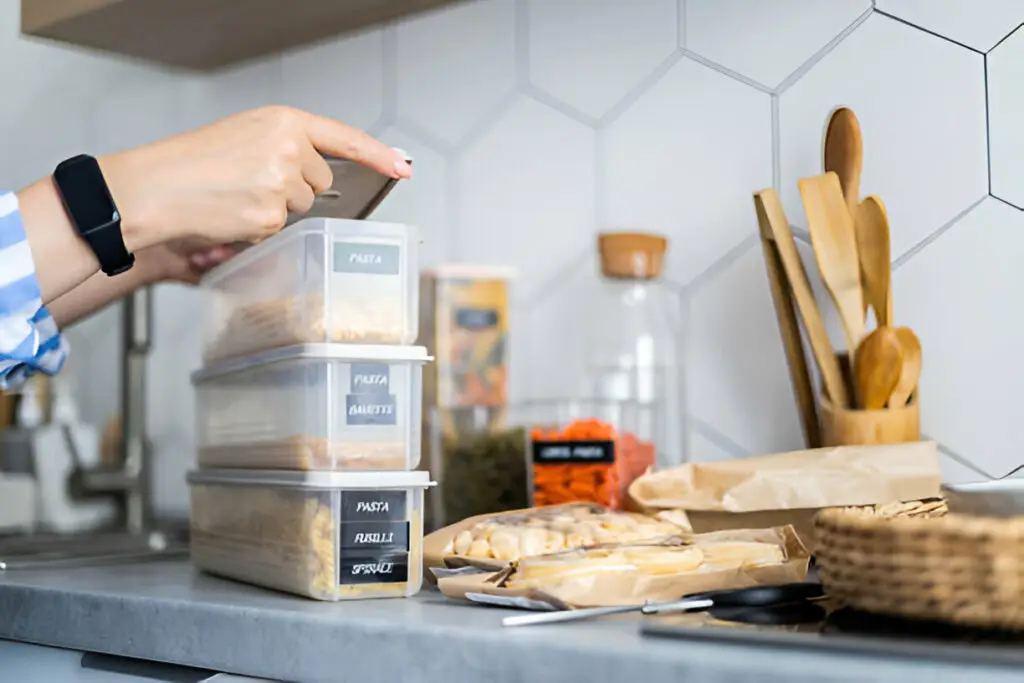
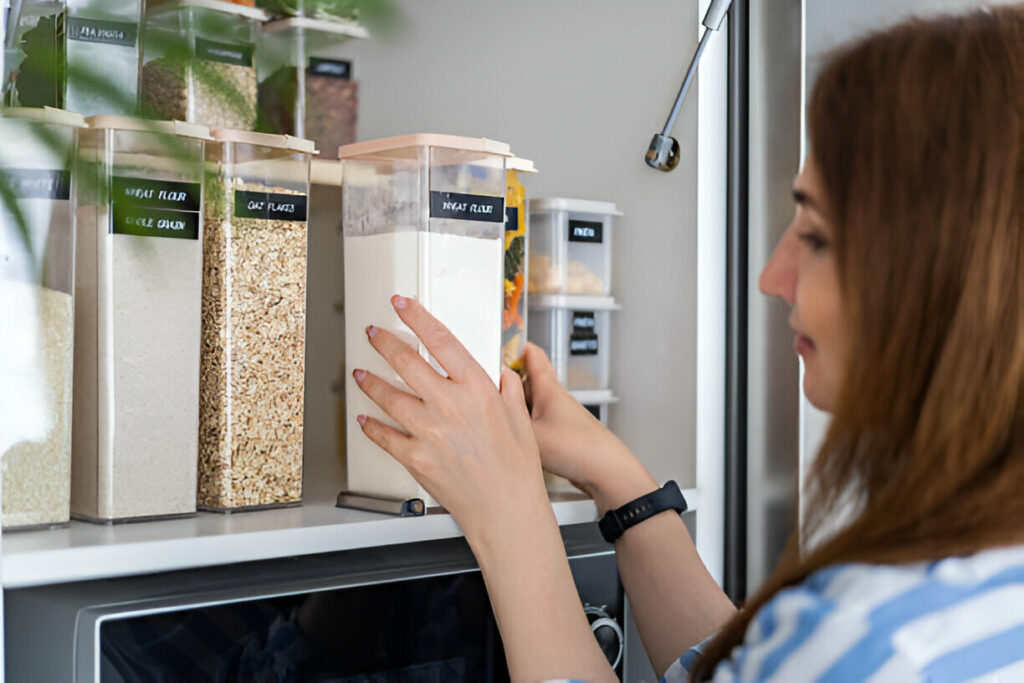
Decant flour, sugar, pasta, and snacks into matching airtight containers and you get three wins at once: you can see what is running low, food stays fresh, and the shelf stops looking like a cereal-box avalanche. Clear containers in a few standard sizes stack flush and kill the wasted gaps that odd-shaped boxes leave behind, which also stops you from buying a third bag of rice you did not need. A tall pull-out pantry takes it further, putting every level in front of you instead of stranding cans in the back.
9. Stand pot lids and bakeware up with vertical dividers
Lids are the chaos agents of every kitchen. Stop stacking them flat. A few vertical dividers (or a cheap tension-rod setup) let you file lids, cutting boards, baking sheets, and muffin tins on their edges like records. You pull one out with a single linear tug instead of unstacking a heavy column, and you reclaim the cabinet floor underneath. Park the divider in the slim cabinet next to the oven or in the gap above the fridge, right where you bake.
10. Put the inside of your cabinet doors to work
The back of a door is free real estate most people ignore. Mount a slim rack for spice jars, measuring spoons, or pot lids; a small bin for foil and plastic wrap; under the sink, a caddy for sponges and gloves. One caution from the install side: screw the organizer into the thick vertical stiles (the door’s side frames), not the thin center panel, or use hollow-core anchors and heavy-duty adhesive. Drive a screw straight into a recessed panel and it can punch through the front face.
11. Divide your utensil, cutlery, and knife drawers
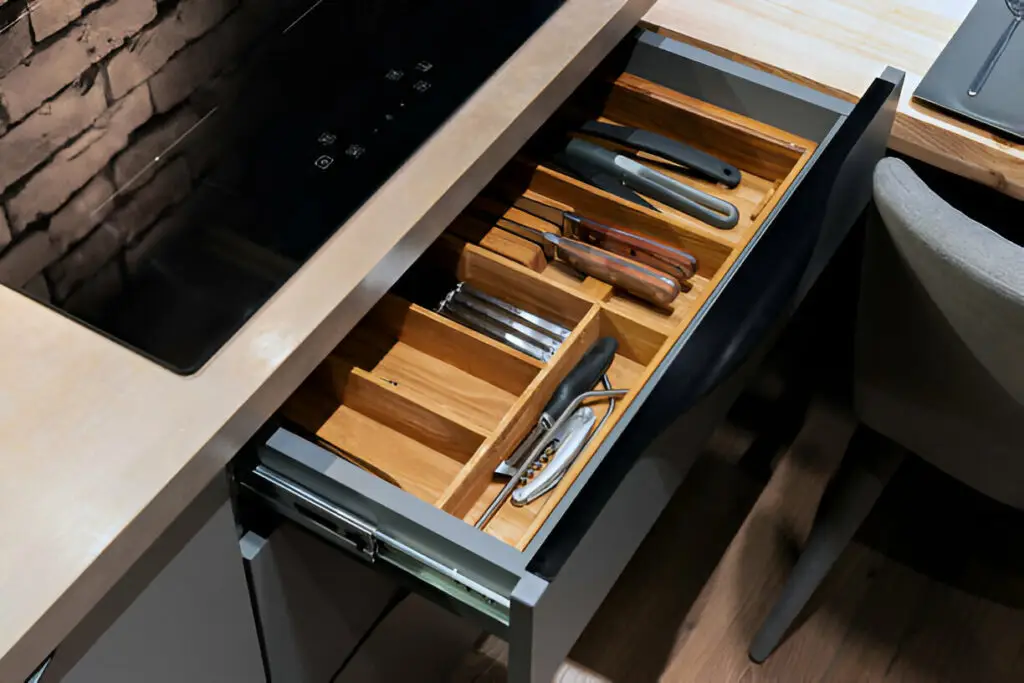
A drawer organizer is a small spend with an outsized payoff. Separate forks, knives, spoons, and everyday tools so you are not digging through a tangle mid-recipe, and add a non-slip liner underneath so nothing migrates when the drawer moves. Adjustable inserts are worth the extra few dollars because they expand as your collection grows, and a multi-tier tray that slides over a base layer can nearly double a shallow drawer. A drawer knife block is the quiet upgrade here: it clears the counter and protects the blade edges from banging against other metal. Keep daily tools in the top drawer nearest the prep zone and push the once-a-month gadgets lower.
12. Corral cleaning supplies under the sink in bins
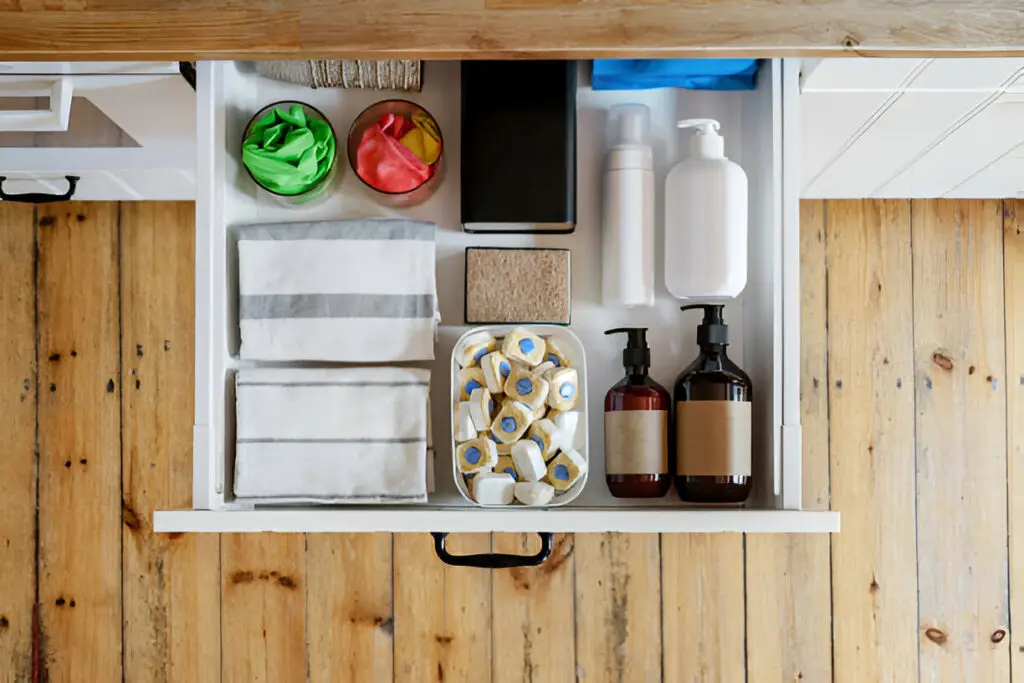
The under-sink cabinet fights you with pipes and odd angles. Bins win that fight. Group products by job, use clear bins so you can see what is left, and choose ones that pull all the way out so you are not crawling past the P-trap. For about $20, a tension rod mounted across the cabinet lets you hang spray bottles by their triggers, clearing the floor entirely; lock the ends with adhesive hooks so it cannot collapse under the weight. Add a drip tray to catch slow leaks early, since a dry cabinet is the real defense against mold. One safety note: keep cleaning chemicals in their original containers and store them up high or behind a child latch, not loose at toddler height.
13. Add shelf risers and tiered shelves up top
Most upper cabinets waste the air between a short stack of plates and the shelf above. A shelf riser adds a second level so mugs sit over plates instead of in front of them. A tiered (stepped) shelf does the same for spice jars and cans, lifting the back row so you can read every label instead of losing the cumin behind the chili powder. Before you buy a riser, try the free version designers point to first: most cabinet shelves are adjustable, so dropping a shelf down a notch often kills the wasted air without any hardware at all. Both moves turn dead vertical space into real storage, and neither needs a drill.
14. Install a pull-out cutting board
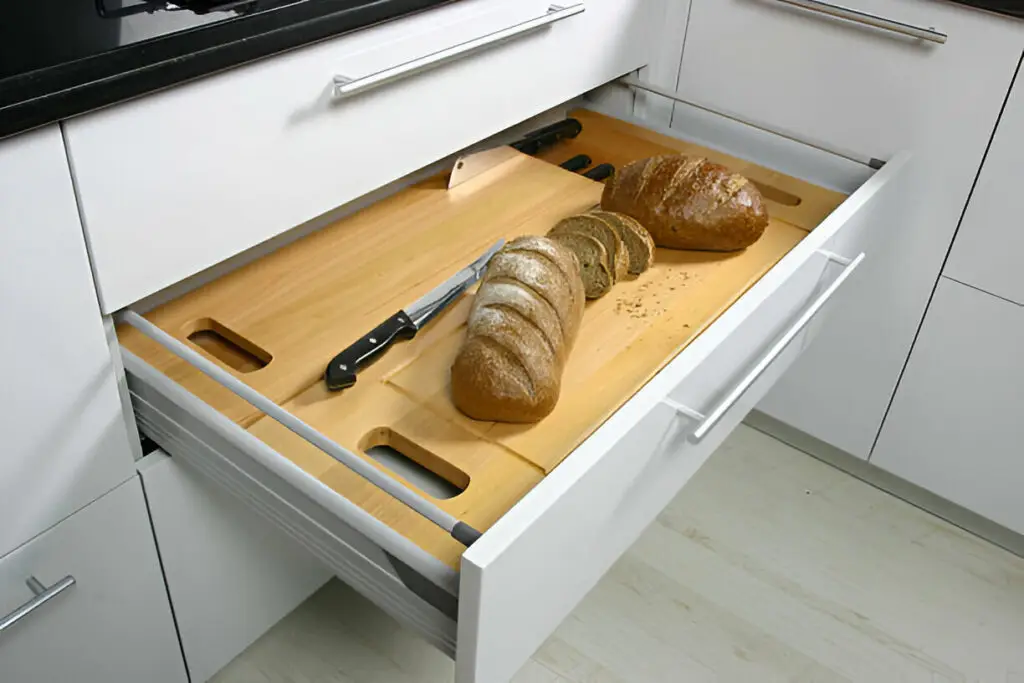
A board that slides out from under the counter gives you a prep surface that vanishes when you are done, which is gold in a small kitchen. Set it near the sink and trash so chopping, rinsing, and tossing scraps all happen in one spot. Hardwood and bamboo look great and last; a synthetic board is the easiest to wipe down. It is a modest add that quietly makes daily cooking smoother.
15. Hang an under-cabinet stemware rack
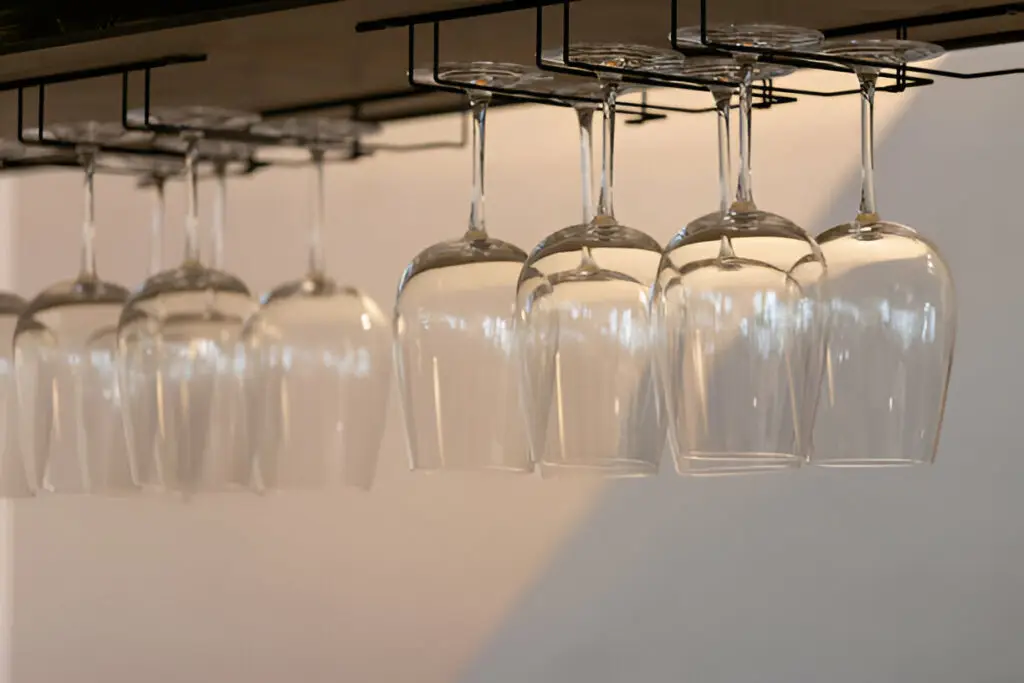
An under-cabinet rack lifts wine glasses off the shelf, frees the space they were hogging, and keeps fragile stems from clinking against everything else. It mounts under an upper cabinet with a drill, a level, and a few screws. Stainless reads modern; wood reads warm. Either way it doubles as a small bit of display that makes the kitchen feel finished.
16. Take cabinets to the ceiling and store seasonal items up high
That gap between the top of your cabinets and the ceiling is lost storage and a dust shelf in one. Running cabinets to the ceiling (or adding a stacked top row) captures it, and it is one of the upgrades homeowners say they love most after a remodel. Use the top shelf for what you reach for rarely: holiday dishes, large platters, the stand-mixer attachments. Keep those items light and in labeled bins, and if reaching is a stretch, a pull-down wall shelf brings the whole top shelf down to you instead of forcing a step stool.
17. Label so the system survives the whole household
Labels are how a tidy kitchen stays tidy after week one. When a bin says “baking” and a container says “rice,” everyone in the house knows where things go back, not just the person who set it up. Label pantry containers, under-sink bins, and any opaque basket. Then keep it alive with a rhythm: reload newer groceries behind older ones each shop, do a two-minute reset weekly, and check expiry dates and duplicates monthly. Five minutes of labeling does more for long-term order than any single organizer you can buy.
18. Know when organizing is not enough
Sometimes the cabinets themselves are the problem. If doors no longer close, shelves sag, or the layout fights you no matter how you arrange it, organizers are a bandage on a bigger issue. At that point, refacing or replacing the boxes returns more than any bin ever will, because you can design in the drawers, pull-outs, and corner hardware from the start, on plywood boxes built to carry them, instead of retrofitting around what you have.
If you are weighing that step, our guides to storage features you will actually use and the storage mistakes most people make are good next reads, and Fabuwood lines build full-extension drawers and soft-close hardware in by default. Working with a tight footprint? Start with our small-kitchen storage ideas.
Ready to build the organization in instead of bolting it on?
Our designers help homeowners and contractors plan pull-outs, deep drawers, and corner solutions before the cabinets are ordered. Visit a USA Cabinet Express showroom in Austin, Dallas, Houston, Fairfax, Fredericksburg, Chesapeake, or St. Louis, and price out Fabuwood, Mantra, and RTA lines.
Frequently Asked Questions for How to Organize Kitchen Cabinets
What is the first step to organizing kitchen cabinets?
Empty the cabinet completely and declutter before you buy anything. Set every item on the counter, apply the “best, favorite, necessary” test, and only then decide what goes back. Buying bins before you declutter just organizes clutter you do not need.
What is the best way to arrange kitchen cabinets?
Arrange by zones based on how you cook, not by item type. Keep pots and spices near the range, prep tools by your main counter, cleaning supplies under the sink, food in one tall cabinet, and dishes near the table or dishwasher. Items you use together should live together.
What goes in upper versus lower cabinets?
Put lighter, everyday items in upper cabinets at eye level: glasses, mugs, plates, and frequently used food. Keep heavy and bulky items in lower cabinets: pots, pans, cast iron, and small appliances. The rule behind it is safety and structure, since lower cabinets carry far more weight than uppers.
Where should glasses and dishes go in the kitchen?
Keep glasses at eye level near the sink or tap so a glass of water is one easy reach away. Store plates and bowls near the dishwasher so unloading is a short trip. Reserve the lowest reachable shelf for whatever you grab most often.
How do you decide where to put things in kitchen cabinets?
Work from two rules in order. First, zones: group items by the task they belong to, so cooking gear lives by the range, prep tools by the counter, and dishes by the dishwasher. Then, within each zone, sort by frequency and weight: daily items at eye and waist level, heavy items in lower cabinets, rarely used pieces up high. If two items are always used together, they share a shelf.
How do I organize a deep corner cabinet?
Use a lazy Susan with wedge-shaped bins so jars cannot topple off the spinning edge, or a blind-corner system. A Magic Corner retrofits well for lighter dry goods, while a LeMans handles heavy cookware on swing-out peanut shelves. With no hardware, split the corner into front for daily, middle for weekly bins, and back for seasonal, and add a stick-on light.
Are pull-out shelves worth it?
Yes, especially in deep base cabinets. Pull-out shelves and roll-out trays bring the back of the cabinet to you, so nothing gets lost behind the front row. They are one of the most affordable ways to make older cabinets work like custom ones, and two trays can roughly double a cabinet’s usable storage. Retrofit shelves run about $47 to $360 depending on size.
What is the best kitchen cabinet organizer?
There is no single best one, because the right organizer depends on the cabinet. Deep base cabinets gain the most from pull-out shelves or roll-out trays. Corners need a lazy Susan or a blind-corner pull-out. Drawers want dividers or pegged inserts. Uppers benefit from shelf risers and tiered shelves. Match the part to the problem instead of buying a random set of bins.
How can I maximize kitchen cabinet space without remodeling?
Start by decluttering, because empty space is the cheapest storage you can get. Then add hardware that uses room you already have: pull-out shelves and roll-out trays in deep base cabinets, shelf risers and tiered shelves in the uppers, vertical dividers for lids and trays, and racks on the inside of the cabinet doors. Drop adjustable shelves to match what they hold, and move daily items to eye level. None of that touches the cabinet boxes.
Should kitchen cabinets have drawers or doors on the bottom?
Drawers, in most cases. Deep base drawers bring pots, lids, and dishes up and out where you can see them, instead of forcing you to bend and reach into a dark cabinet. Add a peg or slanted insert so contents do not slide around. If replacing doors is not in the budget, pull-out trays behind your existing doors are a solid stand-in.
How do I store pot lids so they stop falling over?
Stand them on edge with vertical dividers or a tension-rod setup instead of stacking them flat. Filing lids, cutting boards, and baking sheets upright lets you grab one without toppling the rest and frees the cabinet floor underneath. A door-mounted or under-cabinet lid rack works too.
How do you organize pots and pans in cabinets?
Keep pots and pans in a deep lower cabinet, or better, deep drawers near the range, since they are heavy and used at the stove. Add a pull-out shelf so the back ones stay reachable, and stand lids on edge in a vertical divider instead of nesting them. For a lot of cookware, a pegged drawer insert keeps pieces from sliding, and a corner lazy Susan can hold the bulky stockpots you reach for less often.
Can my cabinets hold heavy pull-out organizers?
Base cabinets can carry 500 pounds or more, so they handle most pull-outs and lifts. Wall cabinets hold only about 30 to 50 pounds per linear foot, so keep heavy loads low. Plywood cabinet boxes anchor heavy hardware better than particleboard or MDF, which can tear out at the screws over time.
How do I keep my kitchen organized long term?
Label everything, give each item a home inside its zone, and maintain a light rhythm: reload newer groceries behind older ones each shop, reset for two minutes weekly, and check expiry dates monthly. Labels are what keep the whole household putting things back in the right place.
When should I replace cabinets instead of just organizing them?
When the boxes themselves fight you: doors that will not close, sagging shelves, or a layout no amount of arranging fixes. At that point, refacing or replacing lets you design in drawers, pull-outs, and corner hardware from the start on boxes built to carry them, which returns more than any organizer.
What is the 5S method for organizing a kitchen?
5S is a workplace method borrowed for the home: Sort, Set in order, Shine, Standardize, and Sustain. Applied to cabinets, you sort out what you do not use, set the keepers into zones within easy reach, shine by wiping shelves clean, standardize with labels and clear containers so everything has a home, and sustain it with a quick weekly reset. It is the same declutter-then-zone-then-maintain sequence this guide follows, under a tidier name.